
# How to Use a Cooking Thermometer for Perfectly Cooked Meals
## Introduction
A cooking thermometer is an essential tool for any home cook or professional chef who wants to ensure their food is cooked to perfection. Whether you’re grilling steaks, roasting chicken, or baking bread, knowing the exact internal temperature of your food can mean the difference between a delicious meal and a disappointing one.
Keyword: cooking thermometer
## Why Use a Cooking Thermometer?
Using a cooking thermometer offers several benefits:
– Food safety: Ensures meats reach safe internal temperatures to kill harmful bacteria
– Perfect doneness: Helps achieve your preferred level of doneness for meats
– Consistent results: Takes the guesswork out of cooking
– Prevents overcooking: Saves you from drying out expensive cuts of meat
## Types of Cooking Thermometers
### 1. Instant-Read Thermometers
These provide quick temperature readings (usually within 2-10 seconds) and are ideal for checking doneness at the end of cooking.
### 2. Leave-In Thermometers
Designed to remain in the food throughout the cooking process, often with a probe that connects to a display outside the oven.
### 3. Oven-Safe Thermometers
Similar to leave-in thermometers but designed to withstand oven temperatures without a separate display unit.
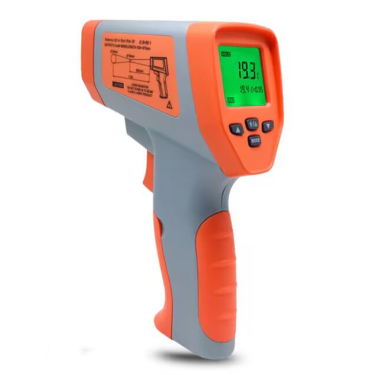
### 4. Infrared Thermometers
Measure surface temperatures without touching the food, great for checking griddle or pan temperatures.
## How to Use a Cooking Thermometer Properly
### Step 1: Choose the Right Thermometer for Your Needs
Consider what you’ll be cooking most often. Instant-read thermometers are versatile for most home cooks, while leave-in models are great for roasts and slow-cooked dishes.
### Step 2: Know the Proper Insertion Points
For meats:
– Poultry: Insert into the thickest part of the thigh, avoiding bone
– Beef/pork roasts: Center of the thickest part
– Steaks/chops: Center of the thickest part
– Ground meats: Insert sideways into the thickest portion
### Step 3: Wait for the Temperature to Stabilize
With instant-read thermometers, wait until the temperature stops rising (usually 10-30 seconds). For leave-in models, monitor until it reaches your target temperature.
### Step 4: Clean Your Thermometer Properly
Always clean your thermometer with hot, soapy water after each use to prevent cross-contamination.
## Recommended Internal Temperatures
Food | Safe Minimum Internal Temperature
Poultry (whole, pieces, or ground) | 165°F (74°C)
Ground meats (beef, pork, lamb) | 160°F (71°C)
Fresh beef, veal, lamb (steaks, roasts, chops) | 145°F (63°C) with 3-minute rest
Pork (chops, roasts, ribs) | 145°F (63°C) with 3-minute rest
Fish | 145°F (63°C)
## Tips for Best Results
– Calibrate your thermometer regularly (at least once a year)
– Don’t let the thermometer touch bone, fat, or gristle
– For thin cuts, insert the thermometer sideways
– Allow meats to rest after cooking (temperatures will continue to rise 5-10°F)
– For large roasts, check temperature in multiple spots
## Common Mistakes to Avoid
– Not waiting long enough for the reading to stabilize
– Inserting the thermometer too shallow or too deep
– Checking temperature too early in the cooking process
– Forgetting to account for carryover cooking
– Not cleaning the thermometer between uses
## Conclusion
Mastering the use of a cooking thermometer is one of the simplest ways to elevate your cooking game. By ensuring your foods reach their ideal internal temperatures, you’ll enjoy safer, more consistent,